
Starshipit shipping
Starshipit is a shipping service operator that facilitates the integration of Australasian shipping couriers with Odoo. Once integrated, users can create shipping methods that will automatically calculate rates from specific couriers (such as Australia Post, NZ Post, DHL, etc.) based on predefined conditions.
Starshipit setup
To get started, go to Starshipit’s platform to configure the account and generate the connector credentials. Log in with the Starshipit account, or create a new one if needed.
Configure the following in Starshipit:
Pickup address
Couriers
Checkout rates
Starshipit API key
Starshipit subscription key
To learn how to configure each of these, see the Starshipit documentation on Integrating with Odoo.
Setup in Odoo
Install
After the Starshipit account is set up, integrate it with the Odoo database. To do that, go to
Odoo’s module, search for Starshipit Shipping, and click
Activate to install it.
Configuration
After the module is installed, create a new shipping method by navigating to and clicking New.
Configure Starshipit in Odoo by filling out the fields on the Shipping Methods form as follows:
Shipping Method: Enter
Starshipitin this field.Provider: Select Starshipit from the drop-down menu.
Delivery Product: Assign or create the delivery product that will appear on the sales order line when the cost of shipping is computed.
Note
The fields discussed in this section are specific to configuring Starshipit. For more information about the other fields, refer to Delivery methods.
In the Starshipit Configuration tab, fill out these fields:
Starshipit API Key: Enter the API key obtained from Starshipit.
Starshipit Subscription Key: Enter the subscription key obtained from the same place as the API key.
Origin Address: Enter the address where products are shipped from. This field is crucial for calculating shipping rates and generating shipping labels.
Default Package Type: Set a default package type to include the weight of the empty package when automatically calculating shipping rates.
Important
To set a default package type, the Packages feature must be enabled in .
Manually save the form by clicking the (Save manually) button.
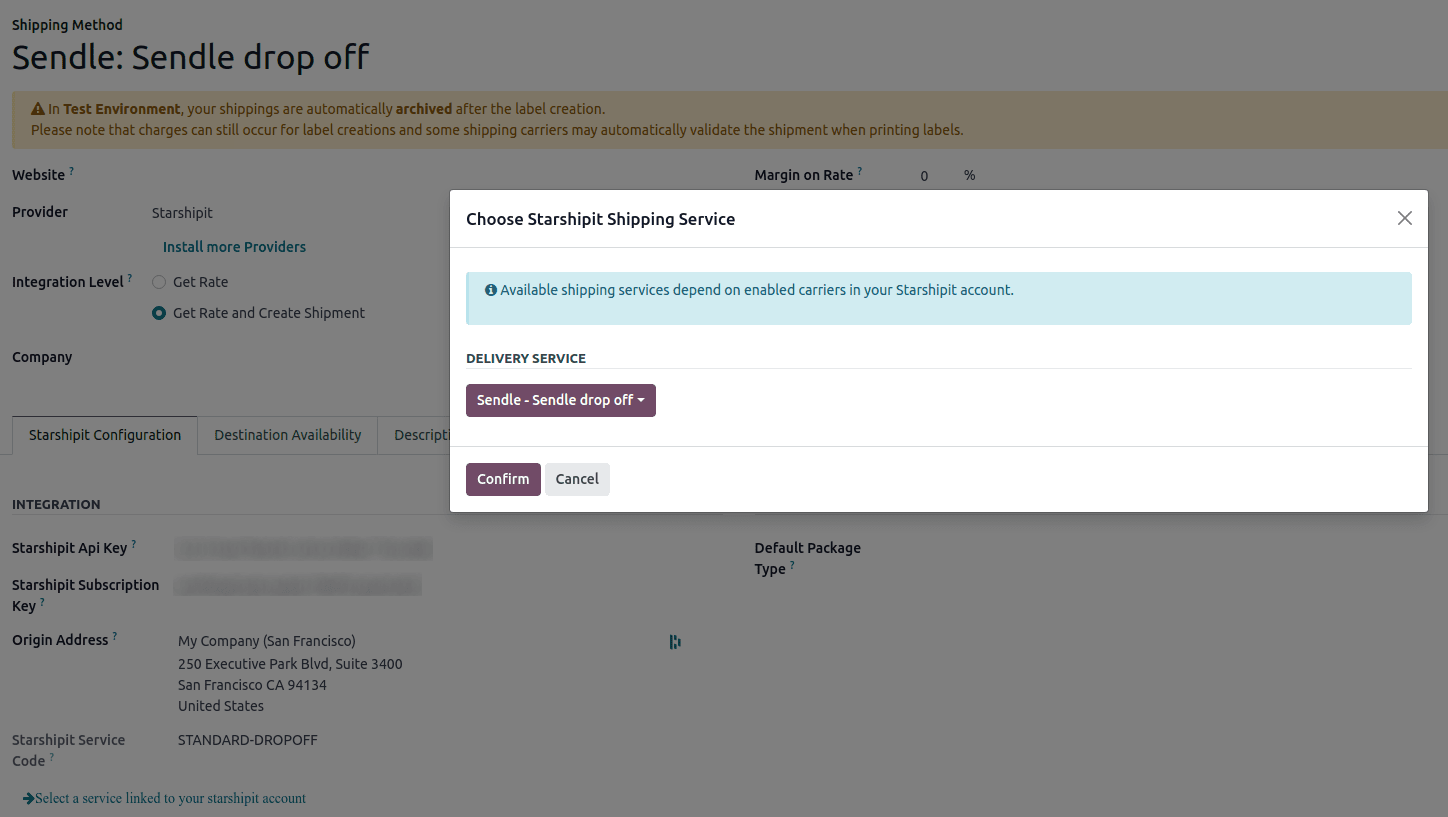
To load the newly configured shipping products, click the Select a service linked to the Starshipit account link at the bottom of the Starshipit Configuration tab.
Doing so opens the Choose Starshipit Shipping Service pop-up window. In the Delivery Service field, choose the desired shipping service for deliveries and returns from the drop-down menu. Finally, click Confirm.
The chosen delivery service will populate the Service Name field.
Example
Sample of a Starshipit shipping product configured in Odoo:
Sendle: Sendle drop off
Shipping Product:
Sendle DeliveryStarshipit Service Code:
STANDARD-DROPOFF
Important
Starshipit does not provide test keys when a company tests the sending of a package in Odoo. This means that if a package is created, the account may be charged.
Odoo has a built-in layer of protection against unwanted charges when using test environments. Within a test environment, if a shipping method is used to create labels, then those labels are automatically canceled after creation. Depending on the shipping provider being used, the account might be charged for printing a label, unless the order is canceled manually on the courier’s portal.
Switch between the test and production environments by clicking the Environment smart button at the top of the shipping method form.
Generate a label with Starshipit
When creating a quotation in Odoo, add the Starshipit shipping method by clicking the Add shipping button.
In the Add a shipping method pop-up window, select Starshipit in the Shipping Method field.
Calculate the shipping rate by clicking Get rate.
Finally, click Add to add the cost of shipping to the sales order line, labeled as the delivery product.
Tip
Odoo automatically calculates shipping costs for Starshipit in both the Sales and eCommerce applications.
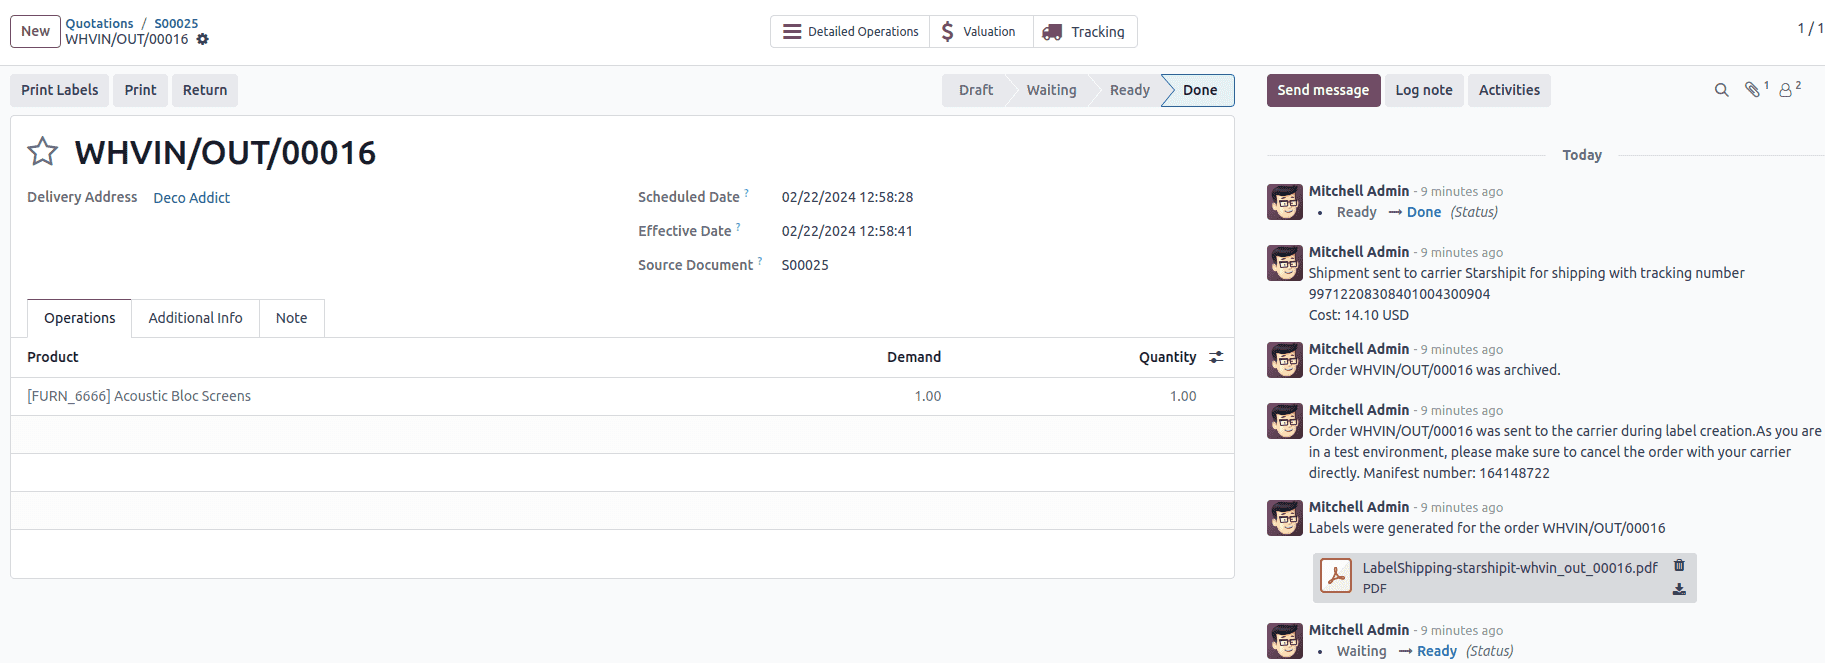
Then, Validate the delivery. Shipping label documents are automatically generated in the chatter, which include the following:
Shipping labels, depending on the number of packages
Tracking numbers, if the selected courier supports it
Return labels, if the Starshipit connector is configured for returns
Important
Package weight in Odoo is calculated by adding the weights of the products plus the empty package saved in the database. Ensure the correct shipping option is selected, as the package weight is not automatically verified.
Verify the destination address, as Starshipit checks it when the order is created.
Finally, some couriers may require other information, such as an email address or phone number. Ensure that all necessary information is set upon sending a shipping order.
Returns
Starshipit allows returns with the following couriers:
Australia Post eParcel
TNT
Couriers Please
Aramex
StarTrack
DHL Express
NZ Post Domestic
To return products, click the Return smart button on the intended delivery order. If the selected courier supports returns, the Print Return Label button is available.
Cancellations
If a delivery order is canceled in Odoo, it will be automatically archived in Starshipit. However, the cancellation will not be sent to the courier itself, so make sure to log in to the courier’s platform to handle the cancellation manually.