
Vị trí tuyển dụng
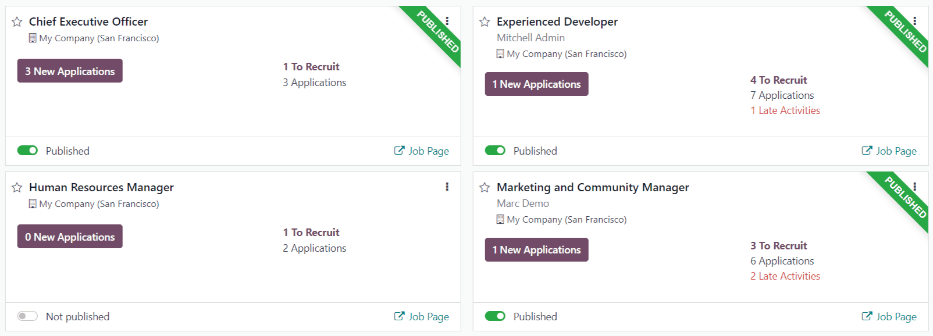
In Odoo Recruitment, all job positions are shown on the default dashboard in the Recruitment app. This includes positions that are being actively recruited for, as well as inactive positions.
Each job position is shown in an individual Kanban card. If the job position is active, and candidates can apply, a Published banner appears in the top-right corner of the card.
Xem các đơn ứng tuyển đã nộp bằng cách nhấp vào bất kỳ đâu trên thẻ vị trí công việc.
Tạo vị trí công việc mới
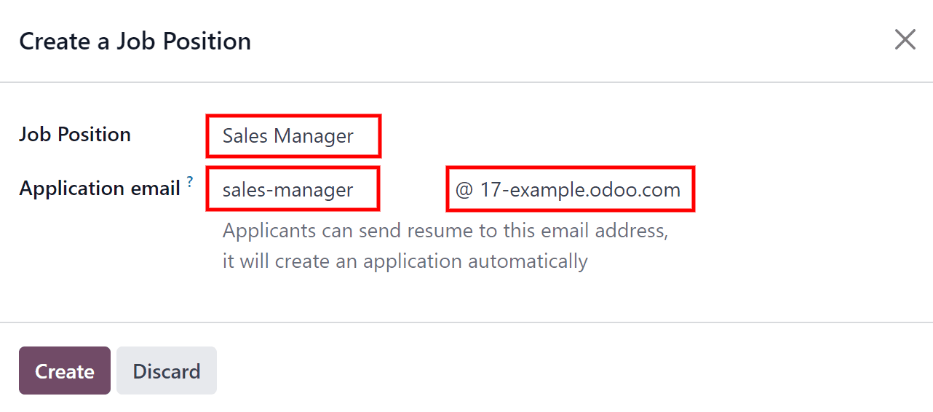
To create a new job position from the main dashboard in the Recruitment app, click the New button in the top-left corner, and a Create a Job Position modal appears.
Đầu tiên, nhập tên của Job Position (chẳng hạn như Sales Manager, Mechanical Engineer, v.v.) vào trường.
Tiếp theo, nhập Application email bằng cách nhập nửa đầu của địa chỉ email vào trường đầu tiên, sau đó chọn nửa sau của email bằng menu thả xuống trong trường thứ hai. Ứng viên có thể gửi sơ yếu lý lịch đến địa chỉ email cụ thể này và Odoo sẽ tự động tạo đơn ứng tuyển cho họ.
Khi hoàn tất, nhấp vào nút Create để lưu mục nhập, hoặc nút Discard để xóa.
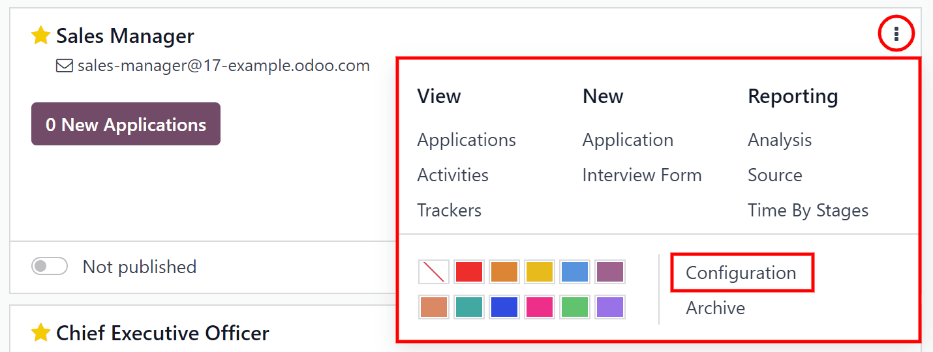
Once the job position has been created, it appears as a card in the Kanban view on the main Recruitment app dashboard.
Chỉnh sửa vị trí công việc mới
After the job position is created, it's time to enter the details for the position. Click on the ⋮ (three dots) icon in the upper-right corner of the relevant card to reveal several options, and then click Configuration to edit the details.
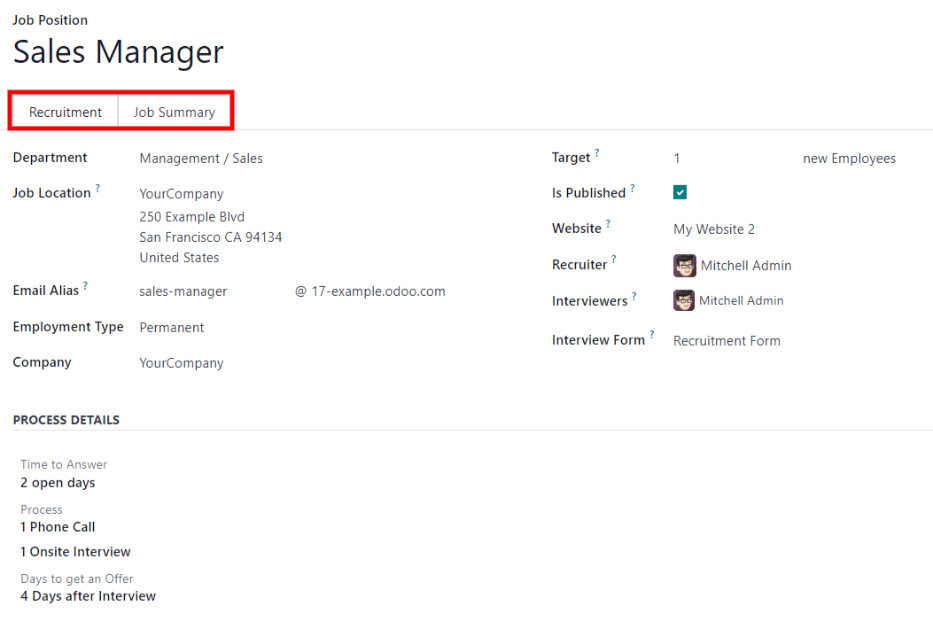
Tất cả thông tin cơ bản về vị trí công việc được liệt kê trong tab Tuyển dụng.
None of the fields are required, but it is important to configure and populate the Department, Location, Employment Type, and Job Summary fields, as they are all visible to prospective applicants on the website.
Các trường có thể được điền như sau:
Department: select the relevant department for the job position. This is visible on the website.
Job Location: select the physical address for the job. If the job position is remote, leave this field blank. This is visible on the website.
Email Alias: enter an email address to which applicants can send a resumé. Once emailed, Odoo automatically creates an application for them.
Employment Type: select what type of position the job is, using the drop-down menu. The default options are Permanent, Temporary, Seasonal, Interim, Full-Time, and Part-Time. This is visible on the website.
Company: select the company the job is for. This field only appears if using a multi-company database.
Target: enter the number of employees to be hired for this position.
Is Published: activate this option to publish the job online.
Website: select the website the job is published on.
Recruiter: select the person responsible for recruiting this role.
Interviewers: select who should perform the interviews. Multiple people can be selected.
Mẫu phỏng vấn: chọn một Mẫu phỏng vấn để ứng viên điền trước khi phỏng vấn.
Contract Template: select a contract template to be used when offering the job to a candidate.
Process Details section: this section contains information that is displayed online for the job position. This informs the applicants of the timeline and steps for the recruitment process, so they know when to expect a reply.
Time to Answer: enter the number of days before the applicant is contacted.
Process: enter the various stages the candidate goes through during the recruitment process.
Days to get an Offer: enter the number of days before the applicant should expect an offer after the recruitment process has ended.
Ghi chú
Phần Chi tiết quy trình là trường văn bản. Tất cả câu trả lời được nhập vào thay vì chọn từ menu thả xuống. Văn bản được hiển thị trên trang web chính xác như xuất hiện trong tab này.
Finally, enter the job description in the Job Summary tab.
Tạo mẫu phỏng vấn
Mẫu phỏng vấn được sử dụng để xác định xem ứng viên có phù hợp với vị trí công việc hay không. Mẫu phỏng vấn có thể cụ thể hoặc chung tùy ý, và có thể ở dạng chứng chỉ, bài kiểm tra hoặc bảng câu hỏi chung. Mẫu phỏng vấn do nhóm tuyển dụng quyết định.
Trước khi tạo mẫu phỏng vấn, đảm bảo đã bật các cài đặt thích hợp. Điều hướng đến , và trong phần Quy trình tuyển dụng, đảm bảo tùy chọn Gửi khảo sát phỏng vấn được bật.
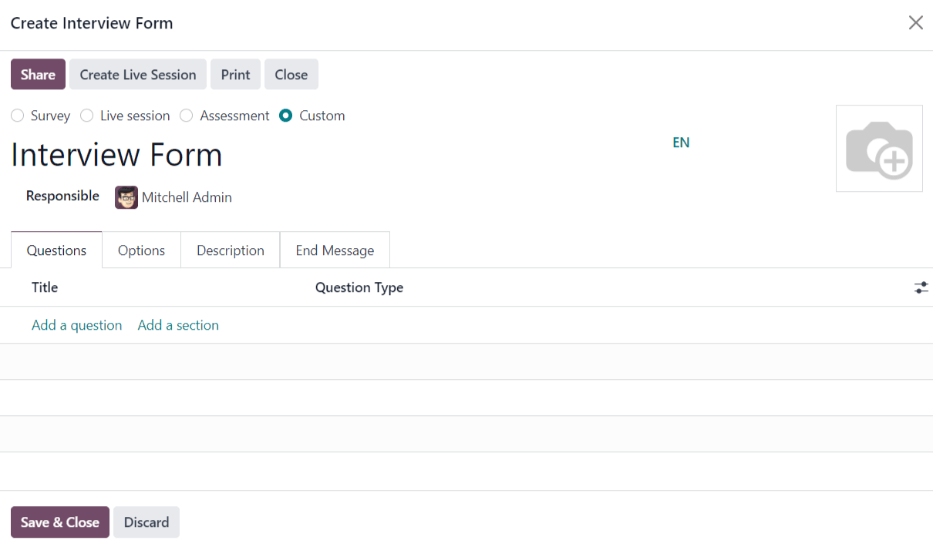
Vì không có biểu mẫu cấu hình sẵn nào trong Odoo, nên tất cả biểu mẫu phỏng vấn phải được tạo. Để tạo biểu mẫu phỏng vấn, hãy bắt đầu từ tab Tuyển dụng của biểu mẫu Chức vụ. Trong trường Biểu mẫu phỏng vấn, nhập tên cho biểu mẫu phỏng vấn mới. Khi nhập tên, một số tùy chọn sẽ xuất hiện dưới mục nhập: Tạo (tên biểu mẫu phỏng vấn), Tìm kiếm thêm... và Tạo và chỉnh sửa.... Nhấp vào Tạo và chỉnh sửa... và hộp thoại Tạo biểu mẫu phỏng vấn sẽ xuất hiện.
Ghi chú
Tùy chọn Tìm kiếm thêm... chỉ xuất hiện nếu đã có bất kỳ mẫu phỏng vấn nào được tạo. Nếu không có mẫu phỏng vấn nào tồn tại, các tùy chọn duy nhất có sẵn là Tạo (tên mẫu phỏng vấn) và Tạo và chỉnh sửa....
Proceed to fill out the modal interview form as a typical survey. For specific directions on how to create a survey, refer to the survey essentials document, which provides step-by-step instructions on how to create and configure a survey.