
Đề nghị vị trí công việc
Once an applicant has successfully passed the various interview stages, the recruitment team is ready to send an offer for employment. The next step is to send the applicant a contract.
Xem thêm
Tham khảo tài liệu tuyển dụng để biết chi tiết về các giai đoạn khác nhau của quy trình tuyển dụng.
Đề xuất hợp đồng
Khi đề nghị sẵn sàng được gửi, trước tiên hãy mở thẻ của ứng viên bằng cách điều hướng đến và nhấp vào thẻ vị trí công việc mong muốn.
Từ chế độ xem Kanban Vị trí công việc kết quả, thẻ ứng viên tương ứng có thể được kéo và thả vào giai đoạn Đề xuất hợp đồng. Hoặc, nhấp vào thẻ của ứng viên mong muốn và nhấp vào giai đoạn Đề xuất hợp đồng nằm trong thanh trạng thái ở góc trên bên phải của biểu mẫu ứng viên.
Bước tiếp theo là gửi đề nghị cho ứng viên. Bắt đầu bằng cách chọn thẻ của ứng viên mong muốn để mở biểu mẫu ứng viên của họ.
On the applicant's form, click the Generate Offer button. A Generate a Simulation Link pop-up window appears.
Hầu hết các trường được điền sẵn với thông tin từ vị trí công việc. Nếu bất kỳ trường bắt buộc nào để trống hoặc nếu bất kỳ thông tin nào cần được cập nhật, hãy nhập hoặc cập nhật thông tin liên quan vào các trường tương ứng.
Ghi chú
Depending on the localization setting for the company, and which applications are installed, some fields may not appear in the Generate a Simulation Link pop-up window.
For example, if the Fleet application is not installed, any fields related to vehicles do not appear.
Các trường chung
The following fields appear in the Generate a Simulation Link pop-up window, regardless of the localization.
Contract Template: the template currently being used to populate the Generate a Simulation Link pop-up window. Use the drop-down menu to select a different Contract Template, if desired.
Ghi chú
To modify the template, hover over the current template name, and click the Internal link icon that appears to the right of the field. Make any desired changes, then click Save & Close.
Job Position: the name of the Job Position being offered to the applicant. The selections available in the drop-down menu correspond to the job position configured on the main Recruitment dashboard.
Job Title: the selected Job Position populates this field, by default. The title can be modified to suit the specific applicant's position and provide more details.
Example
Một ứng viên được đề nghị công việc quản lý tiếp thị tại một công ty giày, cụ thể là cho dòng sản phẩm trẻ em.
The Job Position selected from the drop-down menu is
Marketing Manager, and the Job Title is modified for their specific responsibilities,Marketing Manager: Children's Shoes.Department: the department the job position falls under.
Contract Start Date: the date the contract takes effect. The default date is the current date. To modify the date, click on the displayed date to reveal a calendar popover window. Navigate to the desired month, then click the day to select the date.
Yearly Cost: the annual salary being offered.
Link Expiration Date: the number of days the job offer is valid. The default expiration date is
30days. Modify the expiration date, if desired.
Gửi đề nghị
Once the Generate a Simulation Link pop-up window is complete, click Send By Email to reveal an email pop-up window.
Quan trọng
Nếu ứng viên không có địa chỉ email trên thẻ ứng viên của họ, một cảnh báo sẽ xuất hiện trong hộp màu đỏ ở cuối cửa sổ bật lên Tạo liên kết mô phỏng, nêu rõ: Ứng viên không có email hợp lệ. Liên kết đề xuất sẽ không thể hoàn tất. Nhấp vào Hủy, sau đó nhập email vào thẻ của ứng viên. Sau khi nhập email, nhấp vào nút Tạo đề xuất và cửa sổ bật lên email sẽ tải lại.
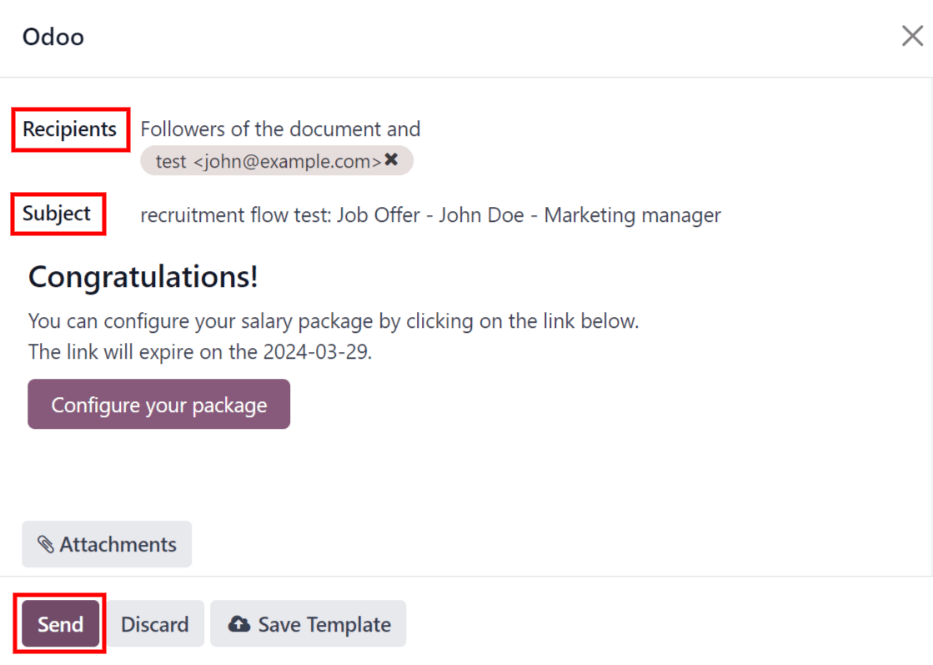
The default Recruitment: Your Salary Package email template is used (set in the Load template field), and the Recipients, Subject, and email body are pre-populated based on the email template.
If any attachments need to be added, click the Attachments button, and a file explorer window appears. Navigate to the desired file, then click Open to attach it to the email. The attachment loads, and is listed above the Attachments button.
Once the email is ready to send, click Send. The email pop-up window closes, and an Offers smart button appears at the top of the applicant's card.
Ghi chú
To send an offer, ensure the Sign application is installed. This is necessary, so the offer can be sent to the applicant by the recruiter, and they can actually sign the offer. The applicant does not need any software installed to sign the offer.
Cấu hình gói của bạn
Nếu có thể áp dụng, ứng viên có thể chỉnh sửa gói lương của họ. Tùy chọn này không khả dụng cho tất cả các bản địa hóa. Tùy thuộc vào vị trí của công ty, tùy chọn này có thể không khả dụng.
Mẫu email bao gồm nút Cấu hình gói của bạn. Liên kết này đưa ứng viên đến trang web, nơi họ có thể chỉnh sửa gói lương được đề xuất và nhập thông tin cá nhân của họ.
Khi ứng viên được tuyển dụng, thông tin cá nhân đã nhập trên trang web sẽ được nhập vào hồ sơ nhân viên của họ khi được tạo.
Once all the information is completed, the applicant can then accept the offer by clicking the Review Contract & Sign button to accept the contract, and sign it using the Sign application.
Hợp đồng đã ký
Once the applicant has accepted the offer and signed the contract, the next step is to move the applicant to the Contract Signed stage. This stage is folded in the Kanban view, by default.
To move the applicant to that stage, drag-and-drop the applicant's card to the Contract Signed stage. If the stage is not visible, click the (ellipsis) button to the right of Contract Proposal on the applicant's form, and click Contract Signed from the resulting drop-down menu.
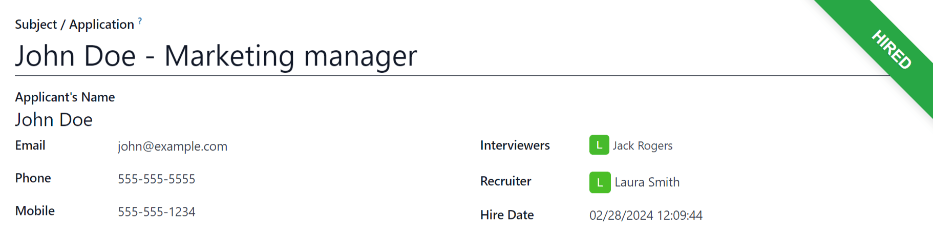
Once the applicant is moved to the Contract Signed stage, a green HIRED banner appears in the top-right of the applicant's card and form.
Create employee
Khi ứng viên đã được tuyển dụng, bước tiếp theo là tạo hồ sơ nhân viên của họ. Nhấp vào nút Tạo nhân viên ở góc trên bên trái của biểu mẫu ứng viên đã tuyển.
Biểu mẫu nhân viên xuất hiện với thông tin từ thẻ ứng viên và hợp đồng nhân viên.
Điền phần còn lại của biểu mẫu nhân viên. Để biết thông tin chi tiết về các trường, hãy tham khảo tài liệu Nhân viên mới.
Once completed, the employee record is saved in the Employees app.